Sunday, October 23, 2016

Final reflection

This was the final week of our math course for Year 2. It's amazing how fast time flies when you are busy. We've gone through so much information and I have learned a lot over the past few weeks. This week our final topic was feedback and assessment; two very important concepts.

I have noticed that many people don't understand how to give meaningful feedback to students; they give marks, but don't tell students how they can improve for next time. Feedback is essential for student learning, so that they understand what you as the teacher are looking for, and how they can be successful. Feedback can be given to students in a variety of ways, a few of which are listed below:
Giulia Forsythe. (2012, November 20). How will students receive feedback? [Graphic]. Retrieved from: link
As you can see, you can give students feedback through written comments on their work, through an audio/video file with your remarks, face-to-face in a conference, and through peer editing or peer feedback. Find a method that works for you and your students, or use a variety of these methods to help students become successful through feedback.

Now that we've talked about ways to give/receive feedback, let's talk about what effective feedback includes. As I mentioned before, some people just give marks and call it a day. For example, this humourous video shows how not to assess students: 


The purpose of assessment is to improve student learning. The feedback we give students should not be vague or give students the correct answer, but give students next steps so that they can be successful next time. If we simply give students the answer, they are not learning anything; we need to lead them in the right direction so that they can figure it out themselves with your guidance.

One of the biggest take-aways from assessment, is the importance of language. We need to be aware of how we give our feedback; it needs to be appropriate, unbiased, positive, and student-friendly. We need to remember that both students and guardians will be reviewing the feedback you give, so be aware of what you say, and how you say it. For example, don't be negative towards a student's answers: "John, this answer sucked, you should have multiplied instead of added the numbers. This answer was mediocre at best, try". This response was negative, unprofessional, used complex language, and gave the student the solution.

Instead, try to say something like: "John, I wonder if you could explain your reasoning for adding? I can see that you added the numbers correctly, good job". This response is positive and praises students for trying to solve the problem. It uses student friendly language, and instead of telling the student what he needed to do correctly, it asks him to explain why he chose this process.

In conclusion, I have learned a lot from this course: be positive about math, ways to differentiate in math, strategies to engage students using technology, and how to give proper feedback. Overall, I think this course has helped me to develop further as a math teacher, and I hope to put this information to good use in my next placement in a few weeks.

Thanks for following me on this journey!

Tuesday, October 11, 2016

Reflection 5

Last week I talked about differentiated instruction, and types of tasks that are beneficial for learning in the classroom. This week I will talk about integrating technology and using Blended Learning to enhance student learning and engagement. 

Blended Learning is a mixture of face to face instruction and online learning. This type of instruction is most used in post-secondary schooling, but is becoming more common in high school and elementary as technology progresses. It is important to note the distinction between blended learning and tech integration. Technology can (and should) be integrated into the classroom where applicable. It can act as a learning tool, modification, or product for students. This can be the use of iPads, apps, etc. to help students understand the context of a lesson, or to help them create something to show their learning. It does not replace teaching. With Blended Learning, students can control their learning pace, place, and path. They learn online using the technology when, where, and how they want to. This gives our students options and allows for DI for students. 


I was surprised to find out that there are four models for Blended Learning: 


  1. Rotation - where students rotate between different learning modes, with at least one is online learning. These modes can include pencil and paper assignments, individual tutoring, group projects, or small group and full class instruction. 
  2. Flex - where online learning is the backbone of student learning. Students have an individualized schedule of the different learning modes that they go through at their own pace. Teachers provide face-to-face support as needed. 
  3. À-la-carte - where students take courses entirely online with an online teacher, but can still have in-class activities
  4. Enriched virtual - where students divide their time between in-class activities and learning online. This differs from À-la-carte because all classes are enriched virtual, and not select classes. 

Personally, I thought that models 3 and 4 where only used in post-secondary education. I know I did some online courses when I was completing my undergrad, but I never thought about them in this way. I hope to try and incorporate a Blended Learning experience in my classroom if I am able. I will be able to do so if I can follow the SAMR Model. 

The SAMR Model is a ladder tool for teachers to follow for integrating technology. It describes what technology can be used for and how it can benefit students. See the model below:
Ruben Puentedura. (2014, September 24). SAMR Model [graphic]. Retrieved from: website
It was interesting to see this model, because a lot of people think that technology can be used the same way as a substitute teacher; teachers get a break from teaching and use technology instead. This is not the case, as you can see. Technology can be used in various ways to enhance learning, and following this model can help teachers use technology appropriately. To understand this model further, view the video below:


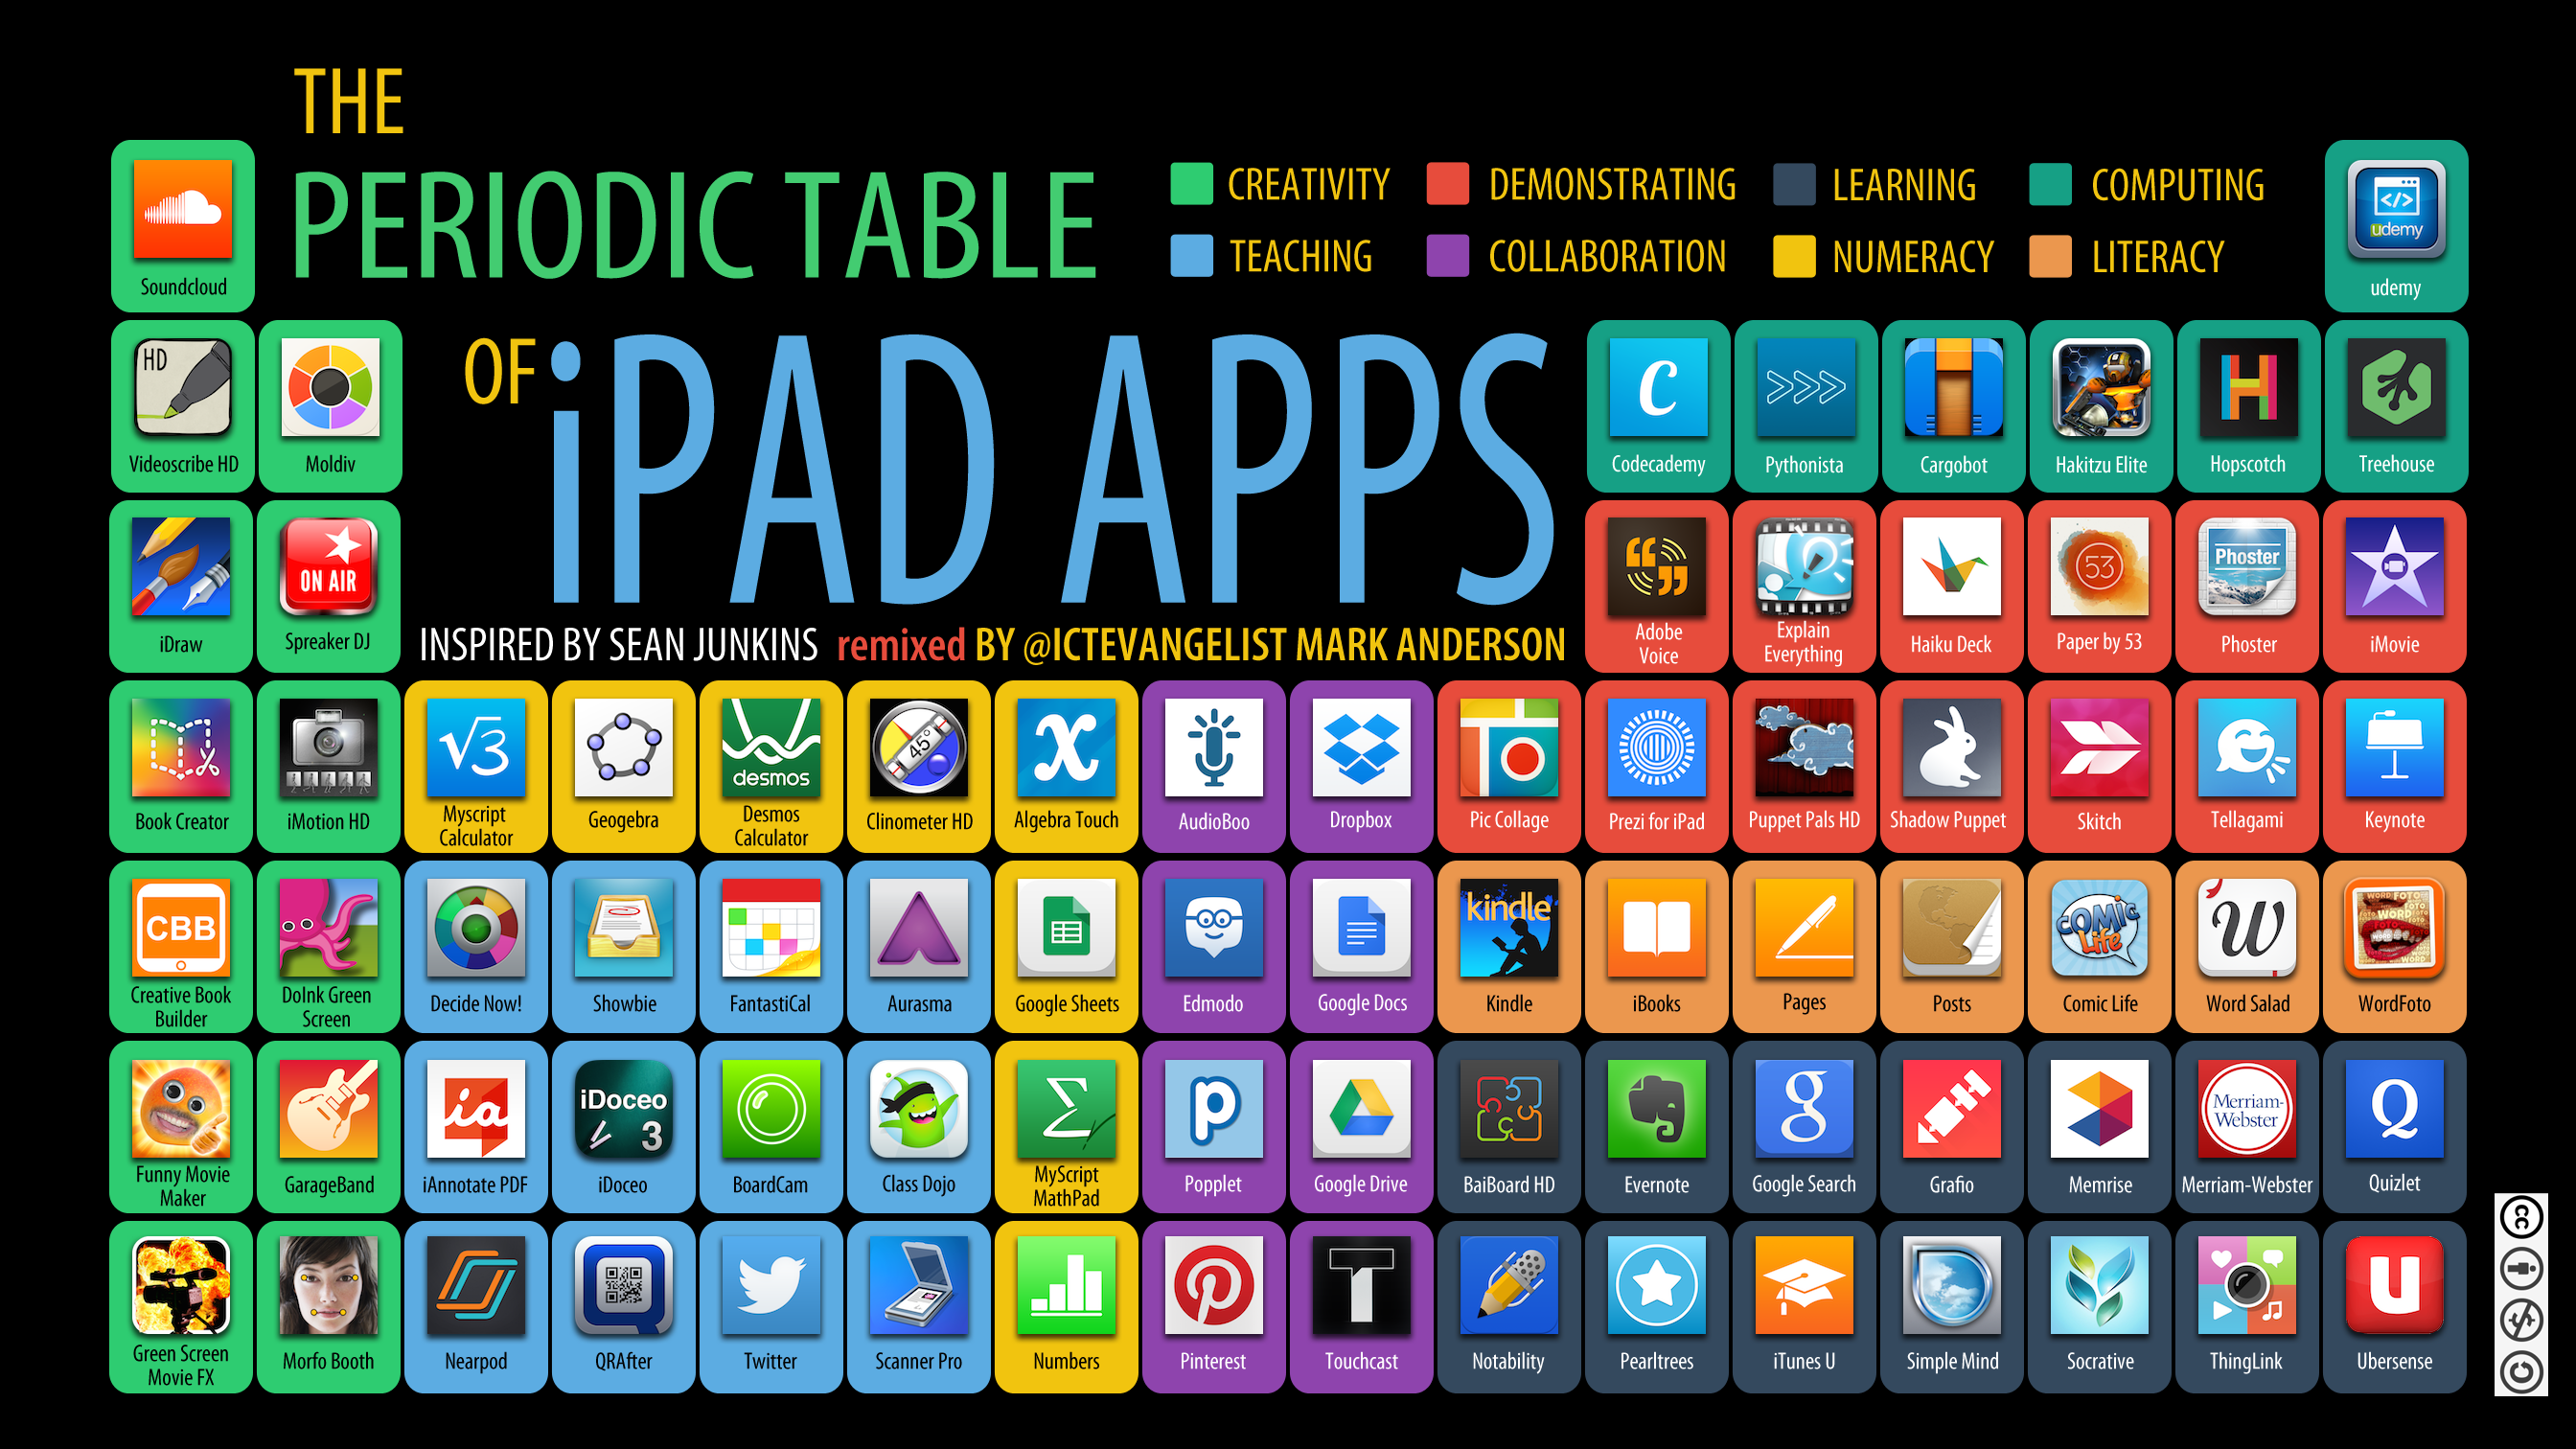
The Pedagogy Wheel  is a chart that gives apps and other resource examples for each level of the SAMR model for teachers to use. I find it extremely useful, because I often have difficulties coming up with specific apps to use in my lessons. Now that I have this chart, I can explore all these resources and find the ones that I think will best benefit my students. Another good chart for finding technology resources is the Periodic table of iPad apps: 


Mark Anderson. (2014, July 23). iPad Apps [graphic]. Retrieved from: website
Other places to find good technology resources for the classroom include Best websites for teaching and learning and 50 Education technology tools every teacher should know about. For more information about the SAMR model, check out this blog on SAMR and Bloom's Taxonomy by Ruben Puentedura.

I'm really excited about using technology and games to engage students into Math. Gone are the days where students are bored with the same math problems from a textbook. With this information and various resources, I hope to keep my students engaged and excited to learning math.

Sunday, October 2, 2016

Reflection 4

Last week we were introduced to parallel tasks. This week we learned about open tasks and rich tasks. Although parallel tasks can be classified as both an open-ended task and a rich task, I have discovered that there are different characteristics to each type of task.

Rich tasks - why are they rich? 
These types of tasks follow certain criteria that allow for deeper thinking in students. These criteria are as follows:
  • Allows for range of student abilities and capabilities to solve. 
  • Multiple representations can be used to show student thinking based on learning styles and preferences 
  • Involves a story or scenario that engages and interests students 
  • Connection to real life examples to get students thinking deeply and allows them to see how mathematics can occur in real life situations 
  • Promotes student discussion through questioning 
  • Enables the use of all 7 mathematical processes
    1. Reasoning and proving
    2. Selecting tools and computational strategies
    3. Representing
    4. Connecting
    5. Reflecting
    6. Communication
    7. Problem Solving 
McEachren, Patricia. (2016, September). Halloween Jack-o-lanterns. 
The problem above is an example of a rich task that my professor presented to us. If you compare it to the criteria above, you can see that it is indeed a rich task. I think these types of problems are great for student engagement and to really challenge students. 

Open tasks - how do they promote learning? 
Christopher Danielson. (2013). Which One Doesn't Belong?
[Graphic]. Retrieved from: http://wodb.ca/
These types of tasks give students options, and the opportunity to validate their choice. There will be different answers, but none of the answers that students give are incorrect if they can explain their approach and the strategies they used to solve the problem. I think that these types of tasks promote learning because they give students a chance to think independently and make a choice for themselves. It gets them thinking about their choice and it is accessible to all since they can choose where they want to start. 

In this image, any one of these items can be the one that doesn't belong. It is up to students to decide which one they think doesn't fit based on shape, colour, font, or font colour. As long as students are able to add to the discussion and explain their reasoning, they have succeeded. However, this particular task is not classified as a rich task, because it is not related to math. This series of tasks (Which one doesn't belong) can be found at this site, which asks students which graph, number, shape, and more don't belong. 

Woolley, E. © 2015
This task is an example of an open task word problem. I asked this question to my colleagues during my webinar session on Differentiated Instruction, which I have included below. This particular task is a better example because it is math oriented. As you can see, my peers chose a variety of numbers to work with to solve their problem, which is exactly what we want our students to do. They have a choice on how difficult they make the problem for themselves, so they can challenge themselves based on their abilities.


These types of tasks will be staples in my Math classroom. Not only will the target student interests to get students engaged in mathematics, but they will also challenge them. The great thing about these types of tasks is that it will challenge my students when they solve them, but they will also challenge me to create the problems.

Thursday, September 22, 2016

Reflection 3

Sylvia Duckworth. (2015, December 29). 6 Golden rules
for engaging students [Image]. Retrieved from: link.
How can we include everyone in class? This is such an important question that is difficult for some teachers to answer. In class we discussed the 6 golden rules for engaging student that give important guidelines to include and engage all students in class. Many of these guidelines highlight what we've discussed in the past few weeks; provide support to our students, foster a sense of competence, create positive relationships, etc. I will reference these rules when I am creating my lesson plans and when I am in the classroom, to ensure I keep my students engaged and maintain a positive learning environment.

How do we differentiate to allow for all students to participate and to understand? This is another important question for teachers. We talked about differentiating from different approaches which include differentiating: 
  • The Content 
    • by asking rich and open problems
    • by including equity and social justice scenarios 
    • by having students set personal goals and strive toward those
    • by posing parallel tasks
  • The Process (how they get to the answer)
    • by letting students work in partners/groups for success according to the objectives of the lesson 
    • by varying time according to the needs of the individuals 
    • by modelling and using manipulatives and other tools
  • The Product (what we expect them to do)
    • by changing the amount of work/number of tasks that students have to complete
    • by assigning appropriate roles in working groups 
Parallel tasks are sets of two or three tasks that are designed to meet the needs of students at different developmental levels, but get at the same big idea and are close enough in context that they can be discussed simultaneously. 

We were introduced to parallel tasks in class, and got to practice solving these open-ended questions ourselves. It was difficult at first, because I was not used to these types of math problems, and I did not know where to begin. It took me a while to feel comfortable, because I did not know which question to choose, or what process to use to solve it. When I realized that there were multiple answers, and different approaches I could take to find an answer, I felt comfortable diving into the problem and finding a solution. One problem I actually enjoyed was:
Woolley, E. © 2015
It was exciting because I had so many options. I could choose either question, as well as choose from a variety of answers. In this image, I answered both choices. One was more difficult than the other, but had the same big idea. 

We practiced coming up with parallel questions so that we understood how to create them for our own students. I found it challenging to come up with meaningful questions, and being able to differentiate, so that all students could be involved. I enjoy this because it is open-ended, and can be used as a good method of differentiation.

We went on to discuss how to take up these types of problems in class, because they are open-ended. We came up with Common Questions that were applicable to both question choices, so that all students were included in the discussion. For example, for the coin problem you could ask students questions such as:
  1. What coin did you start with?
  2. How did you decide what coins to use?
  3. Could the value of the bear be an odd number? 
  4. Did you find more than one answer? 
This way, students could think deeply about the problems, and the questions were relevant to both question options. In the image on the right, shows some of us practicing coming up with meaningful scaffolding and common questions that we can ask our students about parallel questions. This was a good activity, because it got me to think like a teacher and think deeper about what my students are learning, and how I can help them learn, but also understand the kind of questions that show me that they are learning.  


One final important thing from this week’s online modules is that there are multiple ways to solve a problem. Students can approach a problem in different ways, and as teachers we need to accept that students learn in different ways, so they will use different approaches and process to solve a problem. 

The video above talked about how speed does not determine intelligence. Teachers need to move away from the mentality that the students who finish a math problem first are the “smart” students. Teachers need to put an emphasis on the process, not the product. We need to remember that students need time to think deeply about the problem and find the best approach to solve it. Some students need time to analyze and understand the problem fully before trying to solve it. Math is not a race and we need to remind our students of this. We need to give our students time to solve math problems. 

Saturday, September 17, 2016

Reflection 2


So far, this math course has been really great for learning about how to act as a teacher. Last year we focused more on instructional strategies and engaging activities, which was beneficial in our first year. I think focusing on our attitudes and actions this year is a good extension. Many people believe that teaching is just telling students how to do things, but it is so much more than that. It starts with our attitude, which I touched on last week.

This week we talked more in depth about having a growth mindset, which basically means being open-minded and overcoming challenges that occur. It is important to have a growth mindset when doing math because there are many challenges that make the subject frustrating. Both teachers and students need to be open-minded about the problems and be okay with making mistakes. With a growth mindset, making mistakes is a good thing, because we learn from these mistakes and become better. As teachers we need to help our students to have a growth mindset by having one ourselves. We need to model a positive attitude towards the subject, which will hopefully rub off onto our students. 

This video from this week's sessions describes the importance of having a positive attitude about our student's performances. 


I will take this important message to heart in my teaching practice. I will encourage my students to succeed. Not only do I have to have a positive attitude about math itself, but towards my students. If I tell them that they won't do well in math class, then they will become discouraged and fail. It becomes a self-fulfilling prophecy, which is not good in this context. Instead, I need to be encouraging and believe in my students, even when they seem to have given up on themselves. If a student becomes discouraged about a math problem because they found an incorrect answer, I need to change this negative perspective by asking myself and my students how we can take whats right in an incorrect answer. Using a growth mindset I can use the incorrect answer to explain the problem. As a teacher I will accept all answers to further the lesson to make students successful. This will show my students how mistakes are a good lesson for learning and show them how having a positive attitude is beneficial. Hopefully if I believe in them and continue to encourage them to succeed, they will do well. 

For example, in class we were posed with this math problem:


We had to find the which finger we would land on if we counted on our fingers to 1000. It was a challenging question for a few of us, but others figured it out right away. We started by counting to 10 on our hands.
 
Woolley, E. © 2015
I had trouble figuring out how to find out the solution without actually counting to 1000. I did not find the correct solution, I thought it would be the same finger as when you count to 10, but my peers found a different answer. Instead of giving up, I asked for help from my peers. As a team, we were able to figure out the solution and I was able to understand how we solved the problem. I hope to do this in class with my students, so that they are able to be challenged, won't give up, and be able to work together to find the correct solution.

Sunday, September 11, 2016

Year 2 Reflection 1

This was the first week back at Brock for my final year in the B.Ed. program. This year we have another math class, where I hope to continue my personal growth as an educator of mathematics.

Natural Math. (2014, November 15). Math symbols in a
heart [image]. Retrieved from:
https://www.flickr.com/photos/26208371@N06/15798134722
I'm excited to learn more activities and strategies to get my students excited about learning math. This week we went over topics such as brain growth, math myths and stereotypes, and attitudes towards math. It wasn't surprising that the myths, stereotypes, and attitudes were all negative towards math. Many people, including myself, dislike math for many reasons. I found that many of the stereotypes where directed towards females being bad at math. I had hoped that this stereotype had disappeared since I was in school, but it is disappointing to learn that it hasn't. I know many girls that I went to school with, as well as girls in elementary school now who are extremely good at math, and who really enjoy the challenge of solving math problems. As teachers, we need to stop dividing our students' talents into genders. We need to realize that gender has nothing to do with understanding subjects or succeeding in class. The following video explains how ALL students can succeed in math.


This video explains how the brain is like any muscle in the body, and can develop and grow the more that we train it. If we encourage our students to challenge themselves in math class, they can develop their brains and in the end train their brains to be good at math. I think this is such an interesting video and will be useful for when I teach math, because I will be able to encourage every one of my students to challenge themselves. I hope to challenge my students so they work hard and become good at math with practice and perseverance. 

Another resource that I particularly enjoyed was the video Hollywood Hates Math. It was funny, but also eye-opening. It was a compilation of clips from various pop culture movies and shows that showed a negative attitude towards math. It was shocking to realize just how much our society dislikes math. We find it funny to talk about math in a negative way, but we don't realize the impact it can have on our students. When our students see these negative comments on their favourite show or movie, they tend to agree with it. We need to help our students see that math is fun and useful by having a positive attitude ourselves and by showing them positive attitudes in pop culture. 

This week was a good start to this year. I have learned a lot so far, and my attitude towards math is changing. I hope to continue to learn more this year and better myself as an educator.

Thursday, December 3, 2015

Week 12 Final Post

So I just finished my final week of classes. It's been a wild ride these last 12 weeks, and it's kind of a bittersweet feeling. I'm glad that the work is done, but I'm also sad that I won't see people until February after our praticum. I've definitely learned a lot in this class. I've met lots of great people, and found lots of fun activities that I'd love to use in my classroom. Unfortunately, I am in a Core French classroom, so I won't be teaching math. It kind of feels like a waste, since I spent 12 weeks learning about how to teach J/I math, and now I don't even get to use my knowledge. Maybe in my next practicum I will be teaching math, so hopefully I retain this information. At least I have this blog to refer back to to look at some of the strategies and activities to use in the classroom. 

Wednesday, November 25, 2015

Week 11 Reflection

This week we looked at quite a few online resources instead of the text book. This is because the focus was on using technology to teach math in the classroom. I think that this is a really useful topic, since we are being taught to use technology in most of our classes to make lessons fun for our students. A lot of our activities and resources in this class have been apps and videos to use in our classroom, but this week we went into a bit more depth about the resources we can use.

For one, we can use spreadsheet applications, which are interactive computer programs that allow information to be organized, analyzed, and displayed in the form of a table. I think that any interactive method is a good method, because it allows for differentiated instruction, and also tends to make learning more fun for students. Graphing scientific calculators can also be used, which is what I used when I was in school. I thought those were fun to use, but that was years ago, so I'm not sure in students nowadays would enjoy using them. We did a graphing activity, which was a graphing story about swinging. Graphing stories are short video stories that help students learn to graph on a plane. I like this activity, because it puts the problem into a visual, real-life context. For this particular problem, we had to find the height of the swinger's waist over 12 seconds. Watch the video below to see the problem and solutions:


Then we looked at another good program to use online, Desmos Graphing Calculator. We graphed equations like y = (x-2)^2 and played around with the graphing system. We changed the equation and talked about the transformations. This is a good resource to show examples to students, to explain graphing, and also a good manipulative for students to use themselves.

One activity that I really enjoyed was Prodigy Math Battle. Prodigy is an online game for students, where they are in a virtual world and they can battle opponents to win. However, to win the battles they must answer math questions correctly. What a fun and educational tool! Teachers can have their students log in and answer questions related to their unit that they are instructing. They have to go on the website, find the curriculum strand that they want and the specific topic. There are pre-loaded questions where you can select the test items that you want students to practise. This way teacher can create fun assignments that don't seem like homework. From there, the teachers can see their students' results and see where they need help.
Woolley, E. © 2015
We went over how to do this with the whole class, because it is such a good task!
As a class we decided to see the demonstration of how to create a math battle for our own classroom. We chose probability for grade 8, with the specific topic of complementary events. Then, we went through the questions a as a class to see how to use this website.

Woolley, E. © 2015
We also went over assessment of math assignments and tests/quizzes. This was extremely helpful, because in this class we have been focusing on how to teach math to students, but we have not yet talked about how to assess students' learning. Personally, I don't want to be a teacher who gives pop quizzes and tests every week. I want my students to actually enjoy learning, and want to come to class. I don't want to focus on grades, but on improving my students learning, and making math enjoyable for them. One of the resources I looked at before class was an audio file on Assessment strategies.

Another fun activity we tried in class was the finger counting challenge. The video below explains what this is. I like challenges like these because they require students to think about the solution and not just fill in numbers into a formula. Some student solutions can be found at this site.


Finally, we looked at another math challenge: Zombie Bridge Crossing
The video below describes the problem, and reveals the answer if you want to look at it. If not, I can briefly explain it, because I think it's an interesting problem to solve, and allows the students to use critical thinking.

Thursday, November 19, 2015

Week 10 Reflection

We're nearing the end of the course. You can tell, because stress levels are high, as is the work load. However, I still manage to find time to write reflections of my math adventures. We focused on chapters 19, 20, and 21 from our textbook this week, which is a lot of reading. We mainly focused on data management and probability in our class. This is actually one of my favourite topics in math, which is really saying something, since (as I'm sure I've mentioned before) I do not really like math. 

Probability is almost always a hands on unit, using many fun manipulatives to model chance and probability. I think that this would be my favourite unit to teach, even if it is one of the hardest concepts to understand. Students need to understand the concept of odds, certain to, likely to, equal chance, not likely, and never. The least possible value of a probability is 0, which indicates that the event could never occur; the greatest is 1, which indicates that the event must always occur. If students do not understand value or fractions, they may not grasp this concept, so i must be sure that they understand this first.  

Theoretical probability can be confusing, because as the title suggests, it is based on theory. It is probability based on reasoning, written as a ratio of the number of favourable outcomes to the number of possible outcomes. To make it easier to see the possible outcomes, it is a good idea to model out all outcomes. You can use tree diagrams, which gives more details and maps out the probability of outcomes, or area models, which I find to be more confusing and harder to read. You can also graph out the possible outcomes, to find the chances or the outcomes like we did with our prof. He challenged us to pick a die to roll against his and see how many times we could roll a higher number. He had already calculated which particular die would have the highest outcome, so naturally we lost, because we just chose a die randomly. I think this was a good lesson because it proved that the theoretical probability matched the actual outcomes. 

We had a lot of fun activities this week, lots that I would use in my own classroom. Some were simple, and others were a bit more complex, but still lots of fun. For one, we had a spinner with numbers 1-4. We spun 10 times and calculated the outcomes based on our spins: 

Woolley, E. © 2015 
Another activity involved cards, as many probability activities do. Out of a standard deck of 52 cards, we had to write out the odds of various cards. For example, what are the odds of pulling a red card (26/52). We also did the same for a spinner and for rolling a die.
Woolley, E. © 2015
 We got to create our own survey and collect data. I think this is a great activity for students to use their own ideas to collect data. My group chose "how do you get to school" and used a pictograph to collect information. We asked our peers to select their answer and use a picture to response. An awesome, hands on activity for students! 
Woolley, E. © 2015
 Finally, we played a horse racing game, which was a lot of fun. We rolled two die and recorded the number rolled on the graph below. We rolled 52 times before we found the winner, which was #5. It was fun to see how chances worked. We had predicted that 7 would win because there are more variants of 7, but as chance and probability prove, the theoretical outcomes are not always what happens in practise. This was a fun way to play with students and show them theory vs. practise, and also a good way to teach students not to gamble! 
Woolley, E. © 2015

Saturday, November 14, 2015

Week 9 Reflection

This week we discussed Measurement, which was covered in chapters 17 and 18 of the textbook. This was also the week that I got to present my Learning Activity Presentation.

First we talked about time, which I think is a fairly difficult topic to teach. The concept of time as a measurement is hard to understand, so it is a good thing that we reviewed strategies for teaching it. I think that the person who presented this topic did a great job. He made lots of jokes and really captured our attention, which in my opinion is a really good way to engage students. When I become more comfortable with math, I think I will try to incorporate this strategy into my own teaching. I think humour really shows students that you are comfortable being in front of the class and know the material well. It is also comforting for students to hear jokes because it eases the tension and reduces stress that students have with math.

I got to do my presentation, which was kind of nerve-wracking because I'm not the best at math. I think it went fairly well, I don't think I messed up at all. I went over perimeter, and using different manipulatives for measuring length. I think this was a really good experience, because it gave me the opportunity to practice teaching math in front of people. It really got me out of my comfort zone and ready to start teaching math, which I think was a great assignment. I talked about using nonstandard and standard units to measure length and perimeter. I had no idea that there was such thing as nonstandard units, but i think its a really neat concept to teach. It helps students understand the concept of measuring length without attaching it to a standard unit of measurement. Some of my favourite nonstandard and standard units of measurement are pictured below:


Woolley, E. © 2015
Straws, linking blocks, toothpicks, centimetre cubes/ten blocks, string, measuring tape, and a ruler.
 I think that I was well prepared and had an interesting activity planned. I didn't get it from the textbook, because there were no activities planned for teaching perimeter. I found it at this site which listed a few hands-on activities for students. Students had to write their name in block letters onto centimetre grid paper, and then measure the perimeter of each letter and full name using nonstandard and standard units. I liked this activity because students got to be creative and also to practice measuring with different manipulatives. Below is my example that I did with my name:

Woolley, E. © 2015
The other two presenters talked about area and volume respectively. They both had good activities that helped to highlight the concepts of area and volume. We went over some more good hands on activities that I hope to use in my classroom. The one I liked was a real-life activity for calculating volume. We got an empty Kraft Dinner box and centimetre blocks. We used these standard units to measure and calculate the volume of the box. I liked this activity because it was visual and hands-on, unlike the worksheets and questions I had to do when I learned volume. This is better because students can actually see how volume works.
Woolley, E. © 2015 
We did some more fun activities after the presentations. We read a short story about the Pythagorean Theorem, and did an estimating activity. We had to estimate how far we could jump, and then measure it. It was surprising how much fun we had jumping and competing, so I can only imagine that students would have just as much fun with this activity.


Finally, we watched a funny video featuring John Green, one of my favourite authors, explaining 36 unusual units of measure. It was funny, and educational. I would show this video to my class, have them take notes on their favourite obscure units of measurement, and then measure objects as a fun activity.

Tuesday, November 10, 2015

Week 8 Reflection


This week the topic we focused on was Geometry, which chapters 15 and 16 of our textbook covered. In class we looked more closely at 2-Dimensional shapes, 3-Dimensional shapes, and symmetry. We got to play around with a lot of manipulatives, activities, and apps that furthered our understanding of geometry.

One of the things that I found the most interesting regarding 2-D geometric shapes were tangrams. Tangrams are created by dissecting a square into 7 smaller shapes. These 7 shapes can then be used to either recreate the square or a variety of different shapes. Below is an example of a tangram that we worked on in class:
Woolley, E. © 2015
I found tangrams to be really fun and interesting because we were presented with the 7 shapes (2 large triangles, 1 medium triangle, 2 small triangles, a small square, and a small parallelogram) and had to try and create the bigger square. I found it rather challenging trying to fit all these pieces together, but I thought it was an interesting concept, and really demonstrated how geometric shapes can make other shapes.

We also talked about 3-D geometric shapes. This was a fun topic because of the manipulatives we got to play with. We talked about the skeleton of 3D shapes and then we used clay and toothpicks to construct these skeletons. I made a cube, a triangle-based prism, and a square-based prism:
Woolley, E. © 2015
This was a great activity for students to get to see all sides of a 3D shape, and be able to count the edges (counting toothpicks) and vertices (count the red clay). I plan to use this activity in my class, because its a good hands on activity. We also discussed geometric nets, which we could build if we had more class time, and face maps (draw out all the faces of a 3-D shapes. i.e. 6 squares for a cube). These two manipulatives are a good way to show students which 2D shapes make up these 3D shapes. 
We talked about symmetry and the two types of symmetry in geometry: reflective symmetry and rotational symmetry. Reflective symmetry when a shape mirrors its other half, and rotational symmetry is when you turn the shape over itself to see if it is symmetric. We went over plane Symmetry - when one half of a 3D shape reflects onto the other half across a plane. A fun manipulative we used to draw symmetrical shapes was a mira, which mirrors an image so a student can trace it to create a symmetrical shape. Below is a picture of a mira reflecting the other half of the shape:
Woolley, E. © 2015

We were shown various apps this week, but the one I like best was called Symmetry artist. I played around with it after class, because it was a lot of fun. The way it works is you draw on one side of the line of symmetry and the app mirrors your drawing to create a symmetric shape. It is a good example of reflective symmetry because it mirrors the shape that you draw as you are drawing it. This app is fun because you can draw anything (as long as it fits on the drawing area) and you can add details like colour. I could use this as an activity for students to draw their own symmetric shapes by adding lots of detail and using their imaginations.

One of the sites that I explored this week explored the properties of shapes. This site would be good for my students to better understand geometry and gives good examples for creating and constructing shapes on an online sketchpad. I would consider using this as a manipulative for my students because it is a fun, interactive activity to get students to create shapes. It is very in depth with the instructions for creating shapes online, but I would definitely go over how to create shapes on this site with my students so they would know what to do.

Finally, we looked at a commercial for an app called Osmo. It is an interactive app for the iPad that also lets children play with physical manipulatives to better their problem-solving skills:

Thursday, October 29, 2015

Week 7 Reflection

This week we looked at Chapter 22 of the textbook, Patterns and Algebra. I was a bit worried before I started doing the readings, because algebra can be rather intimidating. I don't remember if I was particularly 'good' at algebra when I was in school, so I was a bit worried about this topic. We didn't go too into depth about algebra in our peer taught lessons, we focused more on patterns. There are lots of good tips and strategies for teaching algebra in our textbook (Marian Small provides some of the best strategies), so I am not too worried about teaching it if I have to.

Since this weekend is Halloween, the teacher candidates who taught this week decided to associate the holiday with math, to make it fun. I know I definitely enjoyed these Halloween-themed lessons, so I'm sure it would have been a big hit with kids. I will most definitely try to incorporate holiday themed lessons into my own teaching, to try to engage kids and make things more interesting. I think this is a great strategy to use to get kids excited about math. Halloween-themed math was really tasty, and if I enjoyed it, I'm sure kids would have gone ballistic over having candy to use as a manipulative. We learned about patterning and the rules that go along with it, and we got to create our own patterns using candy. I thought this was a really great idea, and I enjoyed the snack! One of the things we looked over was the core of the pattern; you should include at least 3 repetitions so that students can fully identify the core. Below is the pattern I created using M&M's and Hershey's kisses, with my 3 repetitions of the core pattern:

Woolley, E. © 2015 
I thought this was a fun and creative idea to use candy as a manipulative. Another worksheet that I thought was awesome (and Halloween-themed) was about finishing the pattern, and identifying the pattern sequence. It used pictures to to show patterns, but also found a way to use number patterns (at the bottom of the worksheet), but still managed to make it fun (numbers inside pictures of pumpkins). I think it was really well put together, and a fun way to get kids to practise using patterns. I'm going to save this resource to use in my own classroom.
Woolley, E. © 2015 
 One of the algebra resources that I thought was really cool was trying to identify the word problem with the algebraic expression. I think this was a really smart resource because it helps show students that you can apply real-world situations to algebra. It helps show that algebraic expressions are not just numbers and letters that don't make sense, but you can visualize the problem and find the missing variable to find the answer. The students match up the green pieces of paper, one with the word problem and the other with the algebraic expression. Once they match these up, they can use the blue handout to find what the missing variable is, and complete the equation.
Woolley, E. © 2015 
If students get really confused, they can download the free app on their mobile device called photo math, to take a picture of the equation, and it will solve the problem for them, showing the steps on how the problem was solved. I think this is a valuable resource because it shows students the steps they need to follow to solve the problem, and how to solve similar problems. However, if students use this app to solve all their problems without trying to solve it themselves, they won't learn. If I show this app to my students and allow them to use it, I will only let them use it for really tricky problems that they need extra help with. 

Saturday, October 24, 2015

Week 6 Reflection

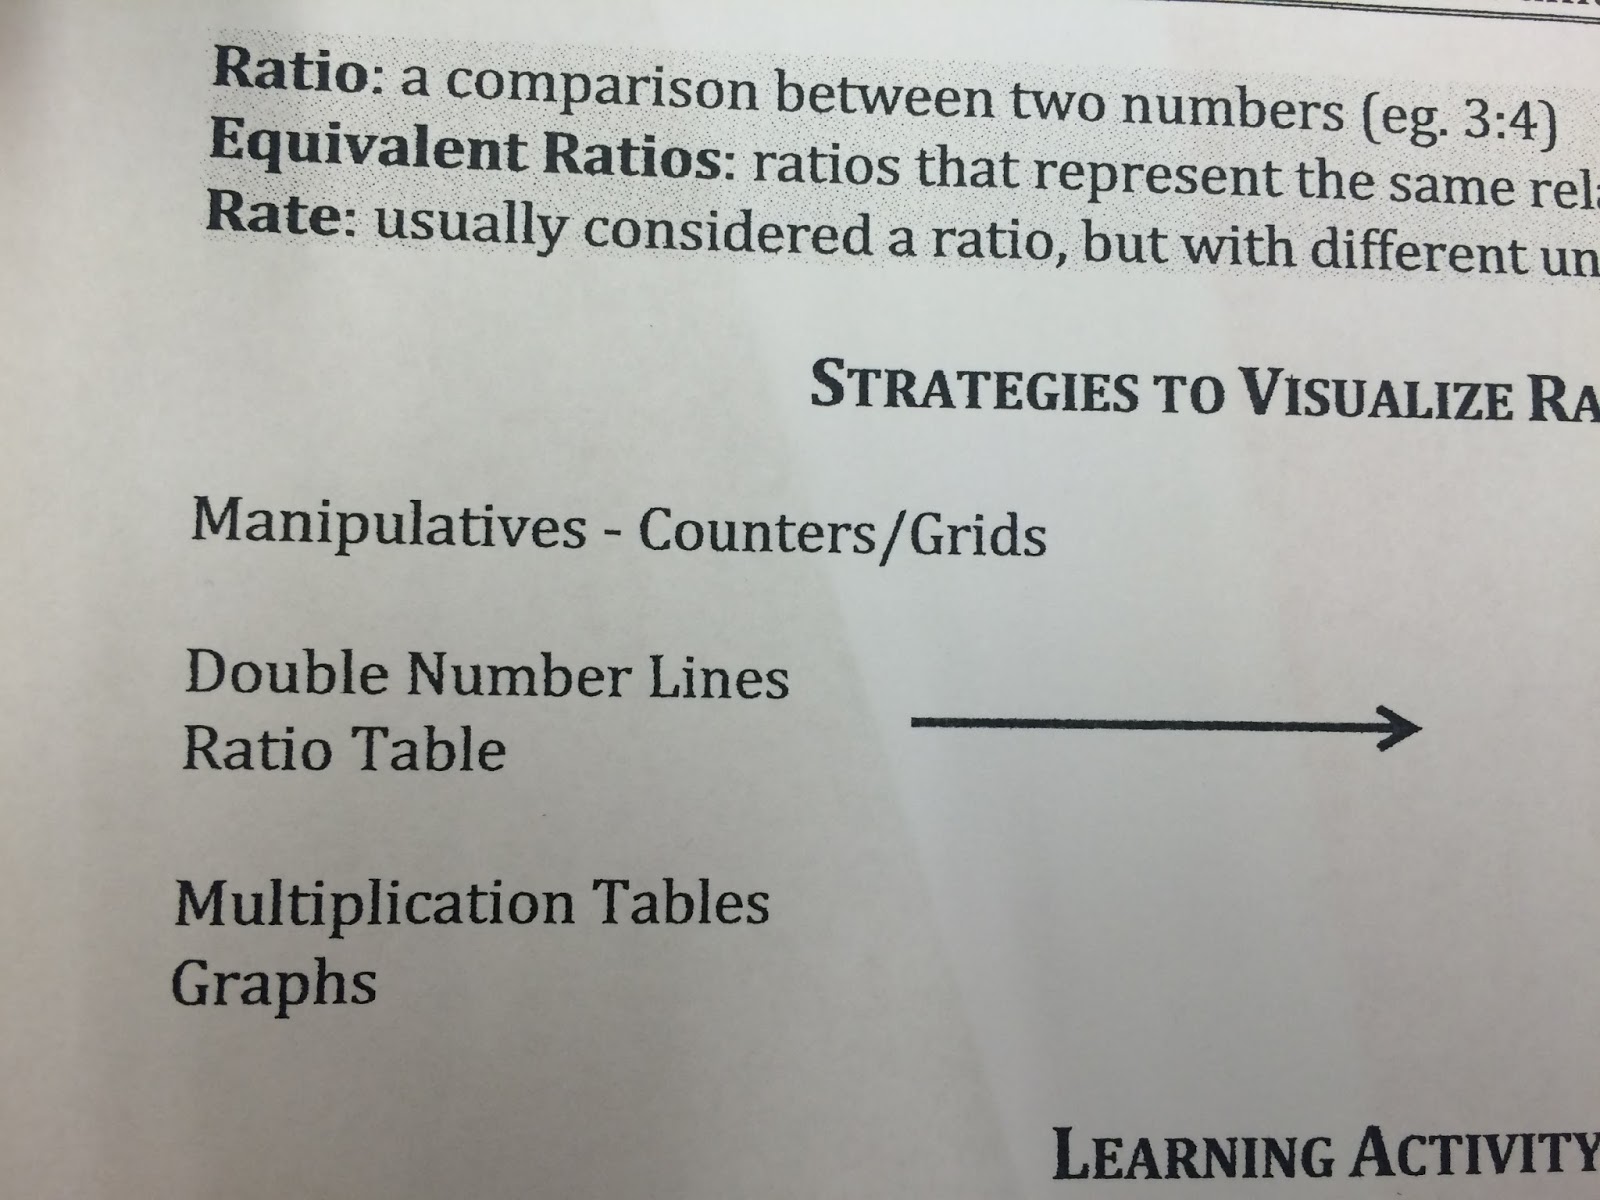
This week you have we read chapter 13 in the textbook which focused on ratio, rate, and percent, but in class we mainly talked about proportional reasoning. We only had one peer present this information to us this week, but it was still quite interesting to learn about. We talked about part-to-part ratios and part-whole ratios in class. This can be a bit of a confusing topic for some students, but with good examples it is can become clearer. We also looked at equivalent rations, which is when two ratios represent the same relationship. For example 3:4 = 6:8. It is much like equivalent fractions, you just have to multiply both numbers by the same number. We went over ratios and rates, and we looked at some good strategies that will help students visualize rate and ratio problems. The handout that we got had this information: 

Woolley, E. © 2015 
Woolley, E. © 2015
Some of the manipulatives that can be used to solve these problems include:
  • counters/grids 
  • ratio tables/charts - double number lines 
  • graphs 
  • multiplication tables - easy to visual equivalent ratios - double it, triple it, etc. and you have your equivalent ratios 
We looked at  a video that showed students problem solving the Chocolate question 
  • absolute cost is the same
  • goal - get the student differentiate absolute cost and relative proportional cost 
    • i.e. cost per unit 
  • 1 chocolate bar 1200g for $10 
  • 1 chocolate bar 1.3kg for $10 
    • first convert to same unit - 1200g and 1300g 
    • both $10 (absolute cost is the same) but one chocolate you get 100g more chocolate for the same price 
The students problem solved the problem and shared their thoughts with the class. 
It went over what informal proportional reasoning is; one student explained the answer, some students didn't understand so she rephrased her answer to make sure everyone understood the problem and the answer and the reason for her thinking. She provided evidence for her thinking and explained her logic. This video was a good example of how to teaching math to younger students and how to get them engaged.  

For the last part of class we talked about the 3-part lesson plan, which is used in most math lessons. We filled in lesson plan template with the model from the video. This way we will be able to understand how to follow the template when we have to write our own lesson plans. Within the 3-part lesson plan there are 7 steps that we have to go through to plan for a math lesson:
  1. Do the math
  2. Questions to ask
  3. Problems to pose
  4. Instructional strategies 
  5. Resources/materials
  6. Assessment 
  7. Adaptations/modifications/extensions 
We also went over a few examples of success criteria for Sharing Your Work in a math class:
  • I can represent my work with a diagram or picture or chart
  • I can select a strategy and use operations to show my work
  • I can explain the actual steps I took to solve my problem 
Overall, this class was very helpful and informative for writing our own lesson plans in math. I will definitely be using this information to help me teach math and plan a lesson plan.

Thursday, October 15, 2015

Week 5 Reflection

This week in class we had more student presentations. We talked about integers, more specifically the order of operations of integers, multiplying and dividing integers, and perfect squares. 
multiplication and division of integers. 

First we looked at the multiplication of integers. As usual, I was fairly lost in the subject, since I don't remember most of the math that I learned in elementary school. Thankfully, the textbook and my peers explain things very well, so I was able to comprehend what was happening. My peers always give great examples of multiple manipulatives that we can use with our students to help make problems clearer. This week we were shown how to use number line charts, integer tiles, and counters to help solve problems involving integers. We also went over what product and quotient means. 
  • product - the answer when 2 or more numbers are multiplied together 
  • quotient - the result obtained by dividing one quantity by another
Then, we went over the order of operations, which doesn't solely apply to working with integers. This is one of the things I actually remember learning in school; BEDMAS or PEDMAS, which stands for brackets/parenthesis, exponents, divide, multiply, add, subtract. We use this when a math problem has more than one operation in it. We talked about how you can divide or multiply first, since it does not affect the solution, but other than that you must follow the correct order of BEDMAS for all other operations. We also went over the revision of powers, for example, 2^(2^2) = 16. This was helpful for me, so I can explain to my students how to figure these types of problems out. 

One of the things I enjoy in this class is finding ways to use math in everyday life. I like finding examples of using math in everyday uses, to prove to students that knowing math is actually useful (contrary to what they believe). Last week we talked about decimals and a real world example was adding money/change. This week we were talking about integers, so the real world example was temperature. 

Woolley, E. © 2015
One of the other things we looked at this week was number sense and numeration: perfect squares and square roots. As a refresher, perfect squares are any number that is the product (multiplication) of 2 equal integers. Square roots are the reverse side of perfect squares; they are a value that can be multiplied by itself to give the original number. We looked at a fun math problem related to perfect squares and square roots. It's called the Locker Problem, and it is explained here. We expect students to be able to use the square root button on their calculators in order to solve these problems, but this problem actually makes them think. I found this porblem challenging, but fun at the same time. It was really educational and I hope to challenge my students with it. Finally, a fun fact that one of our peer teachers shared with us is square root day: 04/04/16, or April 4, 2016.


We looked at two fun math parody videos, that proved how some people enjoy math, and can have fun with it. They made our whole class laugh, a room full of adults and teacher candidates, so I'm sure a room full of elementary students would love watching this, and hopefully be inspired to make their own, fun math video. 

Science and Math War


What is the value of Pi?

Saturday, October 3, 2015

Week 4 Reflection

This week we discussed many things in class and in the readings. We looked at decimals and fractions, and how to add, subtract, multiply, and divide decimals and fractions. It was a great review for me, since I have not done this type of math in many years, only having to add decimals occasionally when paying bills. Having to actually figure out how to use the different operations to solve the problems without a calculator was a bit challenging for me in the beginning, but after viewing some of the great tips that my peers taught, I am more confident in my own abilities to solve these kinds of problems, which means I will be able to effectively teach my own students these great ways to solve math problems involving fractions and decimals.
We looked at some really great ways to subtract decimals. We were shown many different visual aids to solve these problems, which I will definitely be using in my own instruction. I think they're great for students, especially for visual learners. We coloured in 10x10 grids and then took away the amount we were subtracting. This was the same concept, but we used physical blocks as the manipulative (which is a great method for tactile learners). I think it is really good to know these methods, especially for students who struggle with subtracting decimals. Another great method for adding and subtracting decimals is the use of money, since we all use money, and kids are generally fascinated by the concept of money, I think I will use this method when teaching about decimals. Since quarters, dimes, and pennies are in the decimals, it is a good visual for students. This will also help them with a real life situation that students crave (students generally don't want to learn math because they say they will "never use it in everyday life"). We also looked at how to multiply and divide decimals. I forgot about some of these helpful methods, so it was a good refresher to have. Multiplying and dividing decimal numbers is the same as multiply and dividing whole numbers, you just have to ignore the decimal until you have solved the problem, and then add it in its appropriate place. One method that I particularly enjoyed was using the 10x10 grid and colouring in the first amount and then dividing it. 
Woolley, E. © 2015
It was a great visual aid, and I personally understood what it meant to divide decimal numbers. It kind of blew my mind, which is why I really like this method. Understanding that dividing is just grouping the first number into groups of the second number really helped, and this method actually showed me this. Hopefully my students will understand much better, like I did, by using this method.
Another cool method was using the smartboard as a visual. Instead of using physical objects, one person showed us how to use images that represent fractions. This was something that shocked everyone in the class, and I think we will all want to learn how to use smartboards to show our students how to add/subtract fractions using visuals.  
Woolley, E. © 2015
Finally, I am starting to appreciate math more, especially learning all these great new methods. I'm actually having fun with math, which is something I never thought I would say. Hopefully this will make me a much better math teacher, and I will be able to inspire my students to have fun with math as well. One of the optional links that I was playing around with led me to this game where you practise adding fractions by making smoothies. I actually played with it for a good 30 minutes before I realized that I was playing a math game and actually enjoying it! I'm glad that I am learning that math can be fun and that I am discovering good and interactive methods that I will be able to help my students learn better.